Canadian Acres
Farming in the North
DIY Pallet Compost Bins

Well, another week has rushed by and we find ourselves faced with the weekend. This was (another) busy week and we finally finished a few looming projects on our list.
Yesterday I took the time to build myself that DIY pallet compost bin I’d been after, and I was pleasantly surprised by a) how awesome of a job I did, and b) how little time it took.
Since becoming homesteaders, it is hard to be wasteful as we try to beg, borrow, up-cycle and reuse most everything we can. When it came to kitchen waste, it was always a sad moment to throw it out as I know how healthy it would eventually be for my soil. I’d always wanted a compost bin, but alas, since it’s gone trendy, commercial made ones are expensive and it’s kind of hard to get one going in -20 temperatures.
But yesterday was the day! I had my spot picked out since we moved the chicken coop in, and figured behind the sea can would keep it out of sight (and the mind and belly of my goat-dog, Wyatt). I did some research on the online (you have to say that with a southern accent) and wanted something cheap, easy and goat-dog proof.

Side note: Wyatt was dubbed goat-dog because he eats anything and everything and ate through a tin can to get to food once… yep.

Anyway, I found this great tutorial on One Hundred Dollars a Month‘s blog and ventured out to build my very own pallet compost bins.
First, I had Clay bring home some pallets. I requested 5 pallets and we already had one large, long pallet I propped up against the coop for the back of the compost bin. I added two support stakes to hold it in place. I decided to make two separate bins as I had enough room and am pretty sure we’ll fill these puppies up fast.
I then laid out my first two pallets, making sure to line up the outsides so I could add hinges and a latch. My instructions were to take 14 gauge wire and tie the pallets together. Well, we had 18 gauge wire on hand, and it worked just fine. I twisted the wire around the two pallets, binding them together, and did the same in two other spots for each attached piece. It was starting to come together!


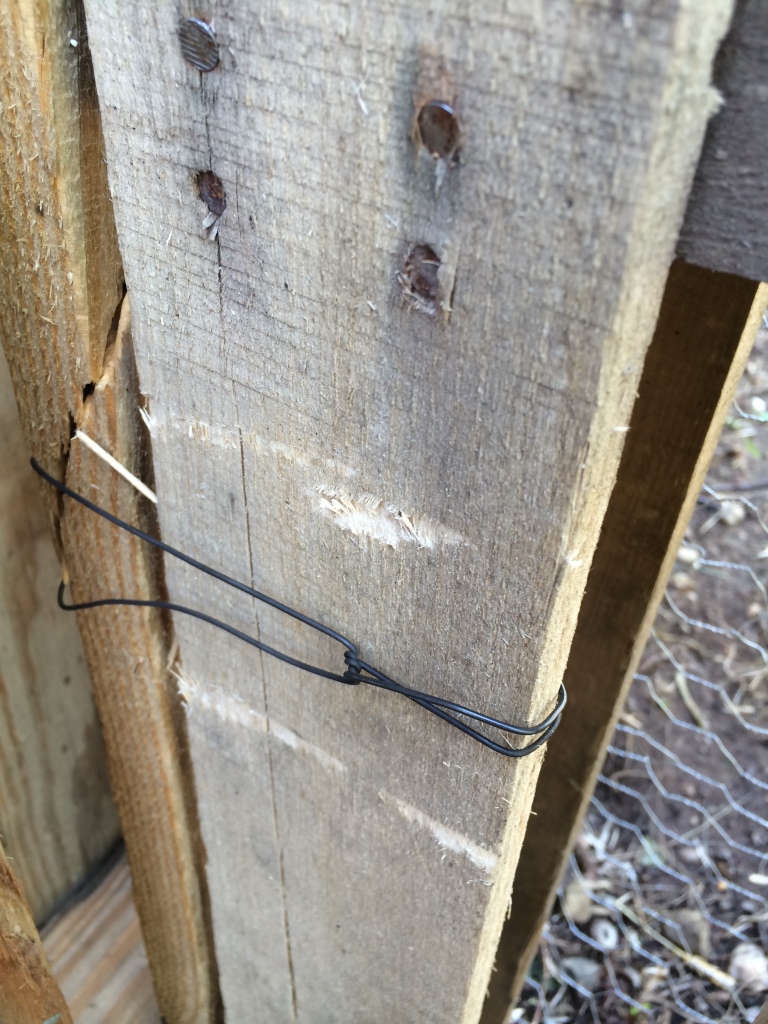
After binding all of the pallets together, I added the hinges and attached each pallet “door”. Again, pretty easy stuff. Well, then I tried to open the door. It was a little wobbly. Apparently the wire wasn’t going to cut it alone. I took some 3″ and 4″ screws to help secure the pallets together and it made all the difference.


Once the hinges were on and the doors were attached, I added two latches, you know, to keep out the goat-dog.

And… Voila! We are in composting business here at the farm. Total time was about 35 minutes… 30 minutes to construct and 5 minutes to shoo away all of my “supervisors”.


Cheers to happy, healthy soil soon!
~Katy

I am impressed! Very handy I must say. Love the look of it, and isn’t it wonderful when it comes together just the way you pictured it. 🙂 Good work miss
lm
Totally impressed !! Great Job , 35 minutes girl ? Wow !! it takes me that much time to just get outside to Start the job 🙂 .. Totally interested in what you & Clay are doing .. LAJ